Creating a .STP file: Difference between revisions
From 1511Wookiee
Jump to navigationJump to search
No edit summary |
No edit summary |
||
| Line 4: | Line 4: | ||
##<p>Set 'Format' to "STEP".</p> | ##<p>Set 'Format' to "STEP".</p> | ||
##<p>Set options to "Download".</p> | ##<p>Set options to "Download".</p> | ||
##<p>The rest can remain as is.<br><span style="margin-top: 0px">[[image: | ##<p>The rest can remain as is.<br><span style="margin-top: 0px">[[image:img1738497100747.png|400px]]</span></p> | ||
##<p style="margin-top: 25px">Click 'Export'<br><span style="margin-left: 25px">NOTE: The file will be saved into your Downloads folder (e.g. C:\Users\''username''\Downloads)</span>></p> | ##<p style="margin-top: 25px">Click 'Export'<br><span style="margin-left: 25px">NOTE: The file will be saved into your Downloads folder (e.g. C:\Users\''username''\Downloads)</span>></p> | ||
Revision as of 14:10, 1 February 2025
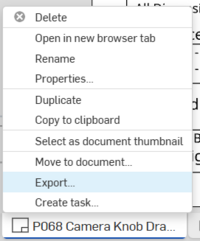
Right-click on the tab for the drawing and select "Export".
In the dialog box that appears:
- Modify the 'File name' to match the part name (i.e. delete the "- Drawing 1..." text)
Set 'Format' to "STEP".
Set options to "Download".
The rest can remain as is.
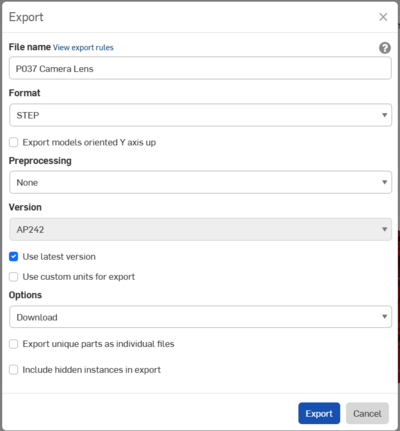
Click 'Export'
NOTE: The file will be saved into your Downloads folder (e.g. C:\Users\username\Downloads)>
- Modify the 'File name' to match the part name (i.e. delete the "- Drawing 1..." text)

