2013:Shooter Storage Subteam: Difference between revisions
(→Week 5) |
Programming (talk | contribs) |
||
| (3 intermediate revisions by 3 users not shown) | |||
| Line 6: | Line 6: | ||
The lifting mechanism uses a lead screw. The lead screw is in the center and on each side there are two linkages that extend or detract when the lead screw moves forward or backwards. This is what creates the different angles for the shooting mechanism. A <u>potentiometer</u> will be used for measuring the angle. Lifting mechanism will allow the shooter to go from vertical (storage) and approximately 20 degrees (lowest possible shooting angle). This design will permit a variable shooting angle. | The lifting mechanism uses a lead screw. The lead screw is in the center and on each side there are two linkages that extend or detract when the lead screw moves forward or backwards. This is what creates the different angles for the shooting mechanism. A <u>potentiometer</u> will be used for measuring the angle. Lifting mechanism will allow the shooter to go from vertical (storage) and approximately 20 degrees (lowest possible shooting angle). This design will permit a variable shooting angle. | ||
[[File:2013 State Machine.pdf]] | |||
<u>'''Pictures'''</u> | <u>'''Pictures'''</u> | ||
| Line 25: | Line 27: | ||
[[File:Shooter pic 1.PNG]] | [[File:Shooter pic 1.PNG]] | ||
<br/>'''Shooter Birdseye View''' | |||
'''Shooter Birdseye View''' | |||
[[File:Shooter pic 2.PNG]] | [[File:Shooter pic 2.PNG]] | ||
| Line 32: | Line 33: | ||
<br/><br/><br/><u>'''Sensors:'''</u> | <br/><br/><br/><u>'''Sensors:'''</u> | ||
{| | {| cellpadding="1" cellspacing="1" border="1" | ||
|- | |- | ||
| Area | | Area | ||
| Line 82: | Line 83: | ||
| Measures the angle of the '''scissor lift '''mechanism | | Measures the angle of the '''scissor lift '''mechanism | ||
| If not in lift broken mode, this will be used to match the angle with the slider on the controls | | If not in lift broken mode, this will be used to match the angle with the slider on the controls | ||
| If the final design the 2nd pot was removed. | | If the final design the 2nd pot was removed. | ||
<u>'''IMPORTANT:'''</u> The angles measured are the scissor members at the drivetrain of the robot, '''NOT the actual angle of the shooter assembly.''' Since this is the case we introduce a non-linearity. At the lowest position of the shooter assembly, we will have the least resolution. | <u>'''IMPORTANT:'''</u> The angles measured are the scissor members at the drivetrain of the robot, '''NOT the actual angle of the shooter assembly.''' Since this is the case we introduce a non-linearity. At the lowest position of the shooter assembly, we will have the least resolution. | ||
| Line 95: | Line 96: | ||
<br/><u>'''Motors/Servors/Actuators:'''</u> | <br/><u>'''Motors/Servors/Actuators:'''</u> | ||
{| | {| cellpadding="1" cellspacing="1" border="1" | ||
|- | |- | ||
| Area | | Area | ||
| Line 144: | Line 145: | ||
<br/><u>'''Lights (on robot):'''</u> | <br/><u>'''Lights (on robot):'''</u> | ||
{| | {| cellpadding="1" cellspacing="1" border="1" | ||
|- | |- | ||
| Area | | Area | ||
| Line 179: | Line 180: | ||
<br/><u>'''Operator Controls:'''</u> | <br/><u>'''Operator Controls:'''</u> | ||
{| | {| cellpadding="1" cellspacing="1" border="1" | ||
|- | |- | ||
| Area | | Area | ||
| Line 293: | Line 294: | ||
Selected motor for shooter is the Mini-CIM becuase higher rpm, smaller size and lower complexity than the M7-RS775-18 BaneBots motor. | Selected motor for shooter is the Mini-CIM becuase higher rpm, smaller size and lower complexity than the M7-RS775-18 BaneBots motor. | ||
{| | {| cellpadding="1" cellspacing="1" border="1" style="width: 727px; height: 103px;" | ||
|- | |- | ||
| Part Number | | Part Number | ||
| Line 354: | Line 355: | ||
== Week 1 == | == Week 1 == | ||
*Decided on a shooter that would hold 4 discs, and be able to shoot into the high goal | |||
*Came up with ideas for how to do this | |||
== Week 2 == | == Week 2 == | ||
*Rough design concepts, including radial shooter, linear shooter | |||
*Came up with different ways for indexing discs | |||
*Prototype for radial shooter created, showed promise of good accuracy | |||
== Week 3 == | == Week 3 == | ||
*Detailed design | |||
== Week 4 == | == Week 4 == | ||
* | |||
Completed AutoDesk construction of Lead screw manipulation device: * *Created Drawings of parts needing machining | |||
On actually measuring (gasp!) the frisbee-wheel system, the frisbee was found to have 10.7" diameter, wheel approx the 7.65 mentioned on AndyMark. The system should have a radius of 14.375 for contact and 14.25 for compression. Probably taking 10.375 with plastic curve backing. | *On actually measuring (gasp!) the frisbee-wheel system, the frisbee was found to have 10.7" diameter, wheel approx the 7.65 mentioned on AndyMark. The system should have a radius of 14.375 for contact and 14.25 for compression. Probably taking 10.375 with plastic curve backing. | ||
== Week 5 == | == Week 5 == | ||
*Parts recieved, assembly begins | |||
*Secondary shooter completed late in week, competition shooter soon after | |||
== Week 6 == | == Week 6 == | ||
Engineering Notebook Templates Available at: | Engineering Notebook Templates Available at: | ||
Please Label All Notebook Pages <u>2013:Shooter Storage XX.XX</u> to avoid confusion. | Please Label All Notebook Pages <u>2013:Shooter Storage XX.XX</u> to avoid confusion. | ||
Latest revision as of 18:17, 16 March 2013
Shooter/Storage Design
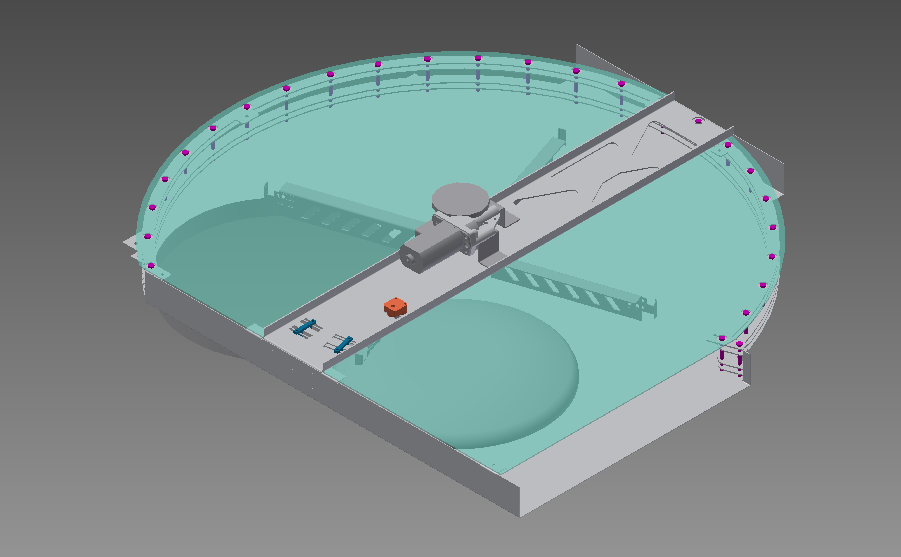
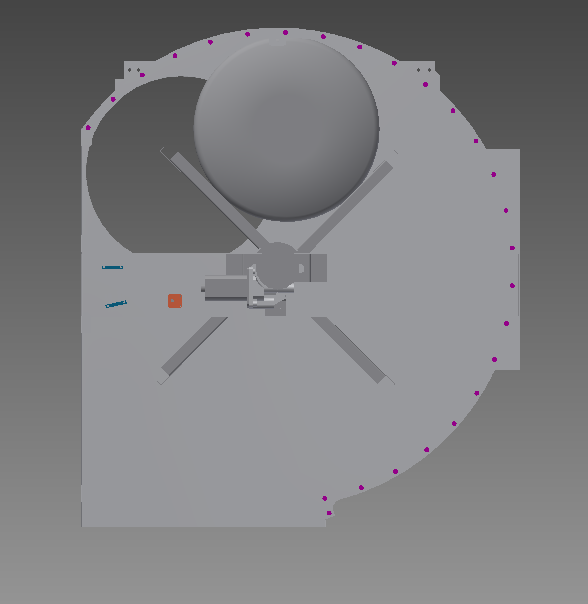
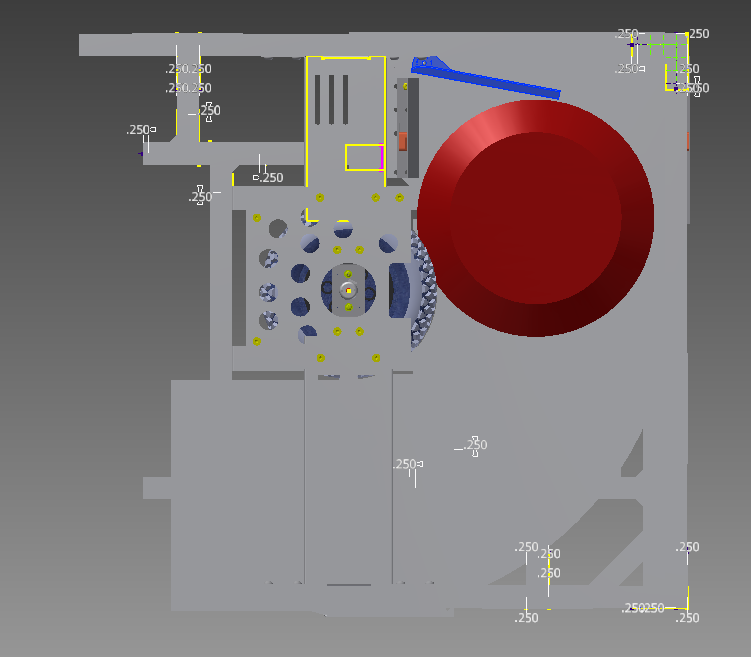
In the storage mechanism, discs enter through the feeder slot. A banner sensor detects that the disc has entered. Fan blades rotate one quarter turn. A flag sensor detects when the fan blades are in the right position to receive the next disc. This continues until all discs are loaded. A second flag sensor detects when the blades are in the correct position so the disc will drop down into the shooter mechanism. The blades then rotate each time to push the discs into the shooter mechanism.
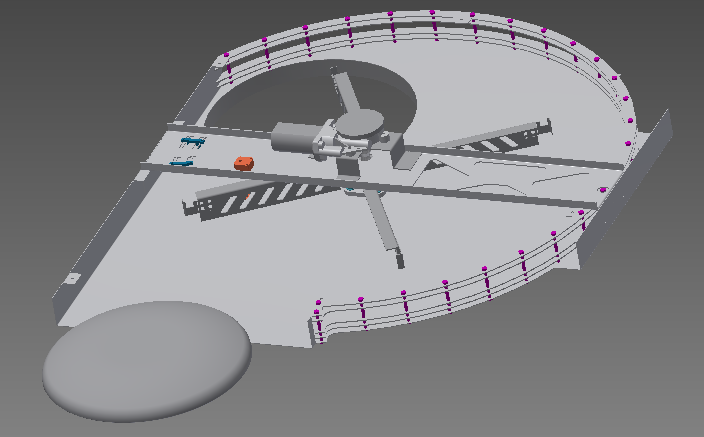
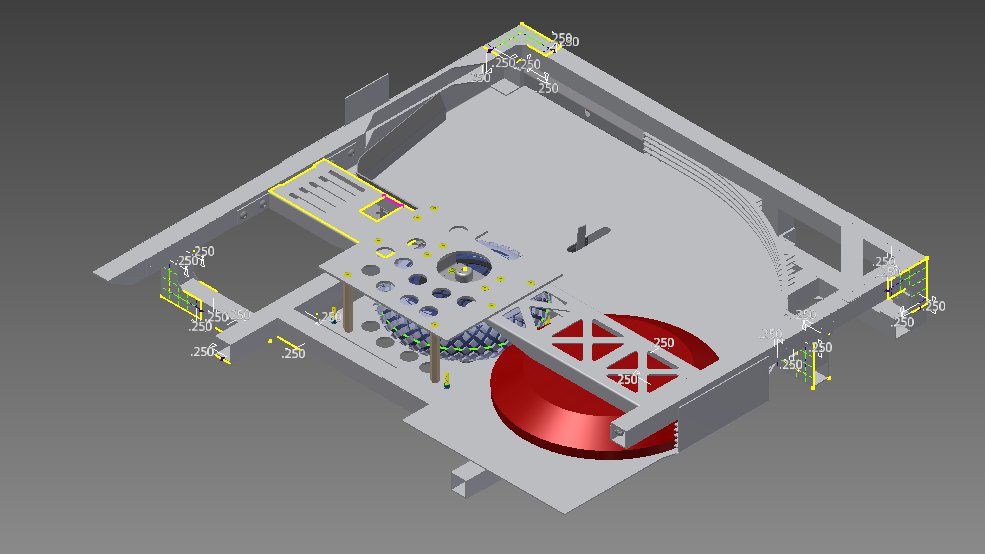
In the shooting mechanism, another banner sensor detects when each disc is in the ready state for shooting. A single servo moves a piece of metal that sticks up though a slot in the base plate to make sure that the disc does not move into the shooting wheel until the wanted time. When time for shooting comes, the servo moves the piece of metal back down into the slot while another servo pushes the disc into the shooting wheel. An encoder will be on the shooting wheel to control the speed of the wheel.
The lifting mechanism uses a lead screw. The lead screw is in the center and on each side there are two linkages that extend or detract when the lead screw moves forward or backwards. This is what creates the different angles for the shooting mechanism. A potentiometer will be used for measuring the angle. Lifting mechanism will allow the shooter to go from vertical (storage) and approximately 20 degrees (lowest possible shooting angle). This design will permit a variable shooting angle.
Pictures
Storage Overview
Storage Birdseye View
Storage Disc Entry
Shooter Overview
Shooter Birdseye View
Sensors:
| Area | Type | Description | Operation | Notes |
| Storage | Banner Pair (Q10RN6R and Q106E) | Detects when the disc is in the feeder slot (slot #1) | When in feed mode, if not the 4th disc, the blades will automatically index the disc to the next slot (slot #2) | Logic LOW = sensor blocked |
| Storage | Feed Flag/Slotted Optical (OPB815) | Detects when fan blades are in position to recieve disc from the human player | Blades will move quickly until the flag trips the sensor, then the blades will be moved slowly until the flag is no longer tripping the sensor. This will allow the discs to index quickly and more accurately. |
Place sensor so the blade in the proper position just after the flag leaves the sensor. Logic HIGH = sensor blocked by flag |
| Storage | Flag/Slotted Optical (OPB815) | Detects when fan blades are in position so the disc will drop into the shooter mechanism | Blades will move quickly until the flag trips the sensor, then the blades will be moved slowly until the flag is no longer tripping the sensor. This will allow the discs to index quickly and more accurately. |
Place sensor such that the blade in the proper position just after the flag leaves the sensor. Logic HIGH = sensor blocked by flag |
| Shooter | Banner Pair (Q10RN6R and Q106E) | Detects when the disc is in the shooting mechanism | If not in shooter broken mode, disc will only shoot when this sensor is tripped and motor is up to speed | Logic LOW = sensor blocked |
| Shooter | Encoder (US digital 100 cpr) | Detects shooter wheel rpm | If not in shooter broken mode, disc will only shoot when the wheel matches the desired speed and disc is detected by the banner the sensor | |
| Lift | Potentiometer (3852A-282-104AL-ND) | Measures the angle of the scissor lift mechanism | If not in lift broken mode, this will be used to match the angle with the slider on the controls | If the final design the 2nd pot was removed.
IMPORTANT: The angles measured are the scissor members at the drivetrain of the robot, NOT the actual angle of the shooter assembly. Since this is the case we introduce a non-linearity. At the lowest position of the shooter assembly, we will have the least resolution. |
| Camera | Used to see targets for shooting and the pyramid for climbing. Maybe for aligning during autonomous. | Faces the shooter side for normal/non-climbing driving. When climbing, the camera will flip 180 and the displayed image will be rotated. The direction is control by the operator controls (see Drivetrain Design) | Center align with the the exit for the shooter. Fixed so that it does not move when shooter/storage mech angle changes. Needs to tilt/flip vertically 180 degrees so it can face the climber side of the robot. Height needs to such that the driver has clear view of the targets, and when flipped the driver needs to be able to see the pyramid. |
Motors/Servors/Actuators:
| Area | Type | Description | Operation | Notes |
| Storage | Snow Blower Motor | Moves the fan blades | If not in storage broken mode, the flags are used to detect the position of the blades. The motor is moved 'fast' until the flag is tripped, and then the motor moves 'slow' until the flag is no longer tripping the sensor. If in storage broken mode, a button on operator controls (more likely a joystick button) is used to move the motor; the motor will move at a constant speed for as long as the button is pressed. | 20A circuit |
| Shooter | Mini-CIM | Moves the shooter wheel | If not in shooter broken mode, the encoder is used by a PID loop to control the speed of the wheel. If in shooter broken mode, the slider on the operator controls will set the speed of the motor. |
40A circuit |
| Shooter | Blocker Servo | Moves a stopper up from a slot in the base plate to stop the movement of the disc from touching the wheel. | If not in completely broken mode, servo is moved when there is a request to fire and there is a disc in the shooter mech and the wheel is at the desired speed | |
| Shooter | Pusher Servo | Moves a flipper that slams the disc into the shooter wheel | If not in completely broken mode, servo is moved after the blocker servo has moved the stopper out of the way | |
| Lift | RS-775 | Moves a lead screw to raise and lower the entire shooter/storage mech | If not in lift broken mode, the pot is used to control the speed of the lead screw and determine the angle of the entire mech. The angle is determined by a slider on the operator controls. In lift broken mode, the slider will just move the motor forward/backwards while the slider is on up/down from the center position. | 30A circuit |
| Shooter | Relay | Turns on light ring |
Lights (on robot):
| Area | Type | Description | Operation | Notes |
| OK to feed | Will be 'green' when in Feed mode and it is ok for the human player to feed a disc. Will be 'red' when in Feed mode and it is NOT ok to feed a disc. Will be off when not in Feed mode. It is OK to feed when the entire mech is at the proper angle AND there are less than 4 discs in the robot AND the fan blades are in the feed position. | Locate the light so it can be seen by the human player (e.g. near the feed slot on the storage mech) | ||
| Number of discs in the robot | 4 individual lights (similar in concept to the 3 we had last year). The count will increase when the Feed Banner sesnor goes from untripped to tripped. The count will decrease when a disc is shoot. Light will have no meaning when broken switch is flipped. | Since there are no sensors for each disc slot, the SmartDashboard will need a way for the drivers to indicate how many discs where put in the robot at the start of the match. The thought is that these lights will have a different meaning when climbing. | ||
| The shooter is at the desired angle | Used to aid the aux driver because the lift may move 'slow' compared what the aux driver is expecting. The Number of discs lights will be 'green' when at desired angle w/at least one disc in robot, 'red' when not at desired angle w/at least one disc in robot; there is no indication if there are no discs in robot. | |||
| Light Ring | Illuminates reflective tape for tracking | Used to illuminate the reflective tape to allow the camera to see the target. |
Operator Controls:
| Area | Type | Description | Operation | Notes | |
| SmartDashboard | Discs in Robot | Set by driver prior to match to indicate how many discs they put in the robot for the match | |||
| SmartDashboard | Camera Crosshairs | Crosshairs that show the center of the robot, to help allign shooter to fire discs appropriatly | This would mostly be a simple line down the middle of the camera feed and across the middle of it to help line up where the disc will shoot. | ||
| SmartDashboard | Angle measuremnet | Angle meter next to on the camera that displays what angle the robot is currently at. This is a slider, but it would also be helpful to have it on the dashboard to make sure angle is where we want it. Would be both a bar with a label next to it. | There are two colors for the bar, red and green. The green will go towards the red (the red will get smaller) as you reach your desired angle. The tip of where the red is is the desired angle, and the green is the current angle. There are also two numbers, one showing desired angle and one showing current angle. | ||
| SmartDashboard | Power meter | Meter next to the camera that shows the robot shooter's current power. Would assist in making sure power is where driver wants it, would be both a bar and a label next to it with a number representing power, scaling from 0 to 100. | There is no real delay for desired power, so this is just shown with one bar. | ||
| SmartDashboard Setup | Team Number | Numberbox | Sets the team number for the robot to set the camera feed. | Should remain constant until we change the IP address of the robot. Should not change very much. | |
| Aux Driver | Button | Feed Mode | When pressed, the lift will put the entire mech at the angle needed for feeding and storage will automatically advance discs as they are feed into the robot. | The aux driver must continue to press the button to stay in feed mode. | |
| Aux Driver | Button | Index Shooter Disc | When not storage system is not broken, the discs will automatically index. When pressed, the storage mechanism will move it's motor at one speed to the index the disc. | The aux driver must continue to press the button to stay in index shooter mode. | |
| Aux Driver | Button | Tilt camera up | While pressed, the camera will tilt up. | Relative to orientation of camera ("front" of robot). | |
| Aux Driver | Button | Tilt camera down | While pressed, the camera will tilt down. | Relative to orientation of camera ("front" of robot). | |
| Aux Driver | Power slider | Control power of shooter wheel | When shooter not broken, slider has no impact on speed, always shoot at max speed. When broken, directly sets the power of the motor. | ||
| Aux Driver | Angle Slider | Control angle of the shooter | When angle pot not broken, directly sets the angle. When broken, sets direction to move the shooter (bottom=lower, center=nothing, top=raise) | Slider is ignored after arms are deployed OR the climber is the front of the robot. | |
| Aux Driver | Button | Control light ring | When held, light ring is on; off when released. | ||
| Broken Switch | Storage Broken | When not broken, the discs will automatically be indexed to the next slot until there are four discs. When broken, the aux driver will use a joystick button to move the fan blade motor (motor moves at constant speed and for the duration the button is pressed). | Set broken if Feed Banner is not working OR if the Feed Fan Flag is not working OR if the second/drop Fan Flag is not working | ||
| Broken Switch | Shooter Broken | When not broken, the discs will automatically fire when: fire button is pressed, a disc is in the shooter mech, and the wheel is at speed. When broken: the shooter motor runs at one speed, which is control by the slider; the blocker & pusher servos will move when the fire button is pressed. | Set broken if the Shooter Banner is not working OR the Shooter Encoder is not working. | ||
| Broken Switch | Lift Broken | When not broken, the lift moves automatically to the angle determined by the position of the slider. When broken the lift motor moves the mech up while the slider is above the its center position; the lift motor moves the mech down while the slider is below its center position; the lift motor does not move while the slider is in its cetner position; there will be a 'dead' spot around center; motor will move at one speed. | Set broken if the pot is not working. | ||
| Broken Switch | Shooter/Storage Completely Broken | When not broken, enter mech works based on the above 3 broken switches. When broken, nothing will work. | Set broken if any motors/servors/actuators are not working. |
Motor Choice: Selected motor for the storage machine is the am-2235 - Snow Blower Motor - Has adequate rpm, is low profile and has more than enough torque. Motor Characteristics- Frisbee is 1/3 pound = 5oz. 4 frisbees so 4 * 5oz. = 20 oz. Required torque =20oz. * 5.5 in.(point of contact to each frisbee) = 110 oz./in. Indexer speed estimate= 1/4 sec per 1/4 revolution = 60rpm Rule of thumb for rpm is 2 * 60rpm = 120 rpm.
Selected motor for shooter is the Mini-CIM becuase higher rpm, smaller size and lower complexity than the M7-RS775-18 BaneBots motor.
| Part Number | Motor Name | Weight (lbs) | Max Power (W) | Stall Torque (oz-in.) | Free Speed (rpm) | Free Current (A) | Stall Current (A) |
|
am-2235 S |
Snow Blower Motor | 1.11 | 30 | 1600 | 100 | 5 | 24 |
|
217-3371 |
Mini-CIM | 2.16 | 229 | 198 | 6200 | 1.8 | 56 |
Resources
Wheel options:
- plain razor scooter:
- Razor electric scooter (espark) rear wheel with sproket:
- Razor electic scooter (e100) rear wheel with sproket:
Looks like e100 is 4.92" ->
Solenoid "Kicker"; 1 in stroke part number 69905K851
--------------------------------------------------
6 inch pneumatic wheel
Access Casters Catalogs
Shooter Storage's Engineering Notebook
Week 1
- Decided on a shooter that would hold 4 discs, and be able to shoot into the high goal
- Came up with ideas for how to do this
Week 2
- Rough design concepts, including radial shooter, linear shooter
- Came up with different ways for indexing discs
- Prototype for radial shooter created, showed promise of good accuracy
Week 3
- Detailed design
Week 4
Completed AutoDesk construction of Lead screw manipulation device: * *Created Drawings of parts needing machining
- On actually measuring (gasp!) the frisbee-wheel system, the frisbee was found to have 10.7" diameter, wheel approx the 7.65 mentioned on AndyMark. The system should have a radius of 14.375 for contact and 14.25 for compression. Probably taking 10.375 with plastic curve backing.
Week 5
- Parts recieved, assembly begins
- Secondary shooter completed late in week, competition shooter soon after
Week 6
Engineering Notebook Templates Available at:
Please Label All Notebook Pages 2013:Shooter Storage XX.XX to avoid confusion.
