2016:Controls: Difference between revisions
From 1511Wookiee
Jump to navigationJump to search
Programming (talk | contribs) No edit summary |
Programming (talk | contribs) No edit summary |
||
| Line 13: | Line 13: | ||
== <span style="line-height: 20.7999992370605px;">Todo</span> == | == <span style="line-height: 20.7999992370605px;">Todo</span> == | ||
*<span style="line-height: 20.7999992370605px;">strap holes on shield</span> | *<span style="line-height: 20.7999992370605px;">shield strap: type; location; holes on shield</span> | ||
*<span style="line-height: 20.7999992370605px;">strap holes on base</span> | *<span style="line-height: 20.7999992370605px;">base strap: type; location; holes on base</span> | ||
*<span style="line-height: 20.7999992370605px;">power: panel mount vs | *<span style="line-height: 20.7999992370605px;">power: panel mount vs retractable (see links below; can do this because we can pull up through the 'top', just need to tied down pc end)</span> | ||
*<span style="line-height: 20.7999992370605px;">e-net location</span> | *<span style="line-height: 20.7999992370605px;">e-net: location, maybe mount on inside since top is off</span> | ||
*<span style="line-height: 20.7999992370605px;">USB hub location</span> | *<span style="line-height: 20.7999992370605px;">USB hub: location; mounting</span> | ||
*<span style="line-height: 20.7999992370605px;">cables extentions needed between controls and hub?</span> | *<span style="line-height: 20.7999992370605px;">cables extentions needed between controls and hub?</span> | ||
*<span style="line-height: 20.7999992370605px;">broken switch joystick board mounting location and holes</span> | *<span style="line-height: 20.7999992370605px;">broken switch joystick board mounting location and holes</span> | ||
Revision as of 15:33, 17 January 2016
Overall concept
The two driver controls will be XBOX controls.
There will be 7 broken switches.
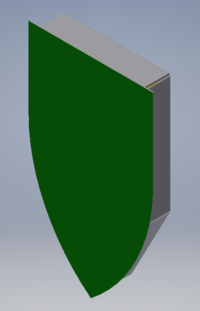
The top of the controls is in the shape of a heater shield. The entire top/shield is detached (no flip up sections); most likely held on with magnets. This allows the shield to be held by the coach/spy during the match. The marketing team will provide the graphic for the shield.
The base will have a strap so driver can carry the entire controls on their back.
Todo
- shield strap: type; location; holes on shield
- base strap: type; location; holes on base
- power: panel mount vs retractable (see links below; can do this because we can pull up through the 'top', just need to tied down pc end)
- e-net: location, maybe mount on inside since top is off
- USB hub: location; mounting
- cables extentions needed between controls and hub?
- broken switch joystick board mounting location and holes
- lights board: which one; location; mounting; power
- are putting 'words' on side of base?
- drawings for model shop (weld the corners)
Sample parts
Retractable cords (these could work if we have a 'door' and tie the female end down:
http://www.amazon.com/Retractable-Entertainment-Equipment-Electronics-Cord-BTT01C/dp/B005DWU0VO

