2016:Lifter: Difference between revisions
From 1511Wookiee
Jump to navigationJump to search
No edit summary |
No edit summary |
||
| Line 32: | Line 32: | ||
<span style="font-size:large;">3.2 Photos</span> | <span style="font-size:large;">3.2 Photos</span> | ||
<font size | <span style="font-size:large;"><span style="line-height: 25.6000003814697px;">This is the hook we will be using.</span></span> | ||
<font size="3"><span style="line-height: 25.6000003814697px;">[[File:Hook.PNG]]</span></font> | <font size="3"><span style="line-height: 25.6000003814697px;">[[File:Hook.PNG|RTENOTITLE]]</span></font> | ||
<span style="font-size: | <span style="font-size:large;">This is the actual arm we designed.</span> | ||
<span style="font-size:medium;">[[File:Scaler assembly.PNG|upright]]</span> | |||
<span style="font-size:medium;">[[File:Scaler assembly 2.PNG]]</span> | |||
Revision as of 17:00, 26 January 2016
1. The Plan
We have come to the conclusion that the best method of scaling the castle near the end of the match is using a telescoping arm to latch onto the bar and then lift with the arm.
2. To Do
- Figure out the measurements that are alotted to the scaler team.
- Collaborate with the drivetrain team to ensure that those measurements will work well.
- Design the telescope nesting arm.
- Finish CAD work.
- Select motors
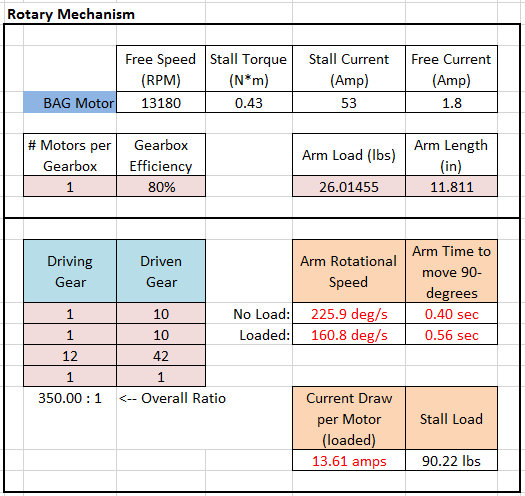
Scaler Pivot Arm:
Use Versaplanetary 100:1
12 tooth sprocket on motor shaft driving a 42 tooth sprocket
3. Update 1/26/16
3.1 What we're working on
- Design rollers/stops for the arm stages
- Design lightning holes
- Design motor mountings and figure out how to attach to the drivebase
- Send parts to chamtek
- Finish CAD work
3.2 Photos
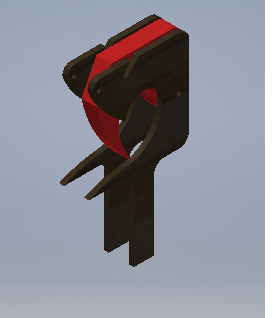
This is the hook we will be using.
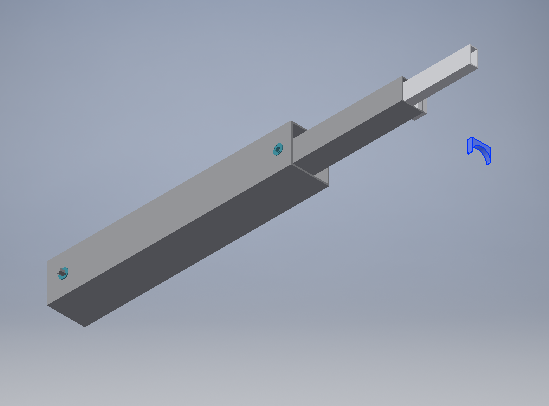
This is the actual arm we designed.


