2023:Arm: Difference between revisions
Mechanical1 (talk | contribs) (1/26) Tag: visualeditor |
Mechanical1 (talk | contribs) No edit summary Tag: visualeditor |
||
| Line 1: | Line 1: | ||
<nowiki>*</nowiki>DISCLAIMER* The wiki wasn't operational for the first week or so of build season, so these entries begin from January 12th-ish and beyond. | |||
== Kickoff through 1/12/2023 == | == Kickoff through 1/12/2023 == | ||
| Line 22: | Line 22: | ||
We made some improvements/modifications to the telescoping arm in Inventor. We started to design a lead screw with a neo motor to lift the arm. We had one of our students cad a motor mount for the neo for the end of the lead screw. We have decided that the lead screw for the pivot will be direct drive instead of belt drive. We had looked at our cad model from Turbulence (our 2022 robot) to take an idea off of that for the lead screw. | We made some improvements/modifications to the telescoping arm in Inventor. We started to design a lead screw with a neo motor to lift the arm. We had one of our students cad a motor mount for the neo for the end of the lead screw. We have decided that the lead screw for the pivot will be direct drive instead of belt drive. We had looked at our cad model from Turbulence (our 2022 robot) to take an idea off of that for the lead screw. | ||
== 1/21/ | == 1/21/2023 - Getting Close with Detailed Design! == | ||
[[File:Screenshot 2023-01-21 224050.png|thumb|Rough Robot Real Estate: 1/21]] | [[File:Screenshot 2023-01-21 224050.png|thumb|Rough Robot Real Estate: 1/21]] | ||
[[File:A002 Telescoping Arm Assembly.png|thumb|A nice render of the arm as of 1-24]] | [[File:A002 Telescoping Arm Assembly.png|thumb|A nice render of the arm as of 1-24]] | ||
| Line 28: | Line 28: | ||
The arm design is really coming together! We are now going with a hybrid chain and belt system for extension and retraction. We were originally going to go all chain, all the way through, but ran into major space/clipping issues due to the square nested nature of the mechanism. The goal is to reduce as much "slop" in between stages as possible, with somewhat rocky movement being a hallmark of the 2016 arm. This arm also reuses bearing blocks in order to make manufacturing easy. Also, we plan to make large lightening holes in our different stages to make easy of access better. We also did a rough weight check and we came in at 11 lbs! We also checked in with the RCS people to get a rough layout of sensors. We went through the CAD and imported hardware, checking for conflicts between bearing blocks too. There were a few small issues, but nothing we can't fix tomorrow! | The arm design is really coming together! We are now going with a hybrid chain and belt system for extension and retraction. We were originally going to go all chain, all the way through, but ran into major space/clipping issues due to the square nested nature of the mechanism. The goal is to reduce as much "slop" in between stages as possible, with somewhat rocky movement being a hallmark of the 2016 arm. This arm also reuses bearing blocks in order to make manufacturing easy. Also, we plan to make large lightening holes in our different stages to make easy of access better. We also did a rough weight check and we came in at 11 lbs! We also checked in with the RCS people to get a rough layout of sensors. We went through the CAD and imported hardware, checking for conflicts between bearing blocks too. There were a few small issues, but nothing we can't fix tomorrow! | ||
== 1/22/ | == 1/22/2023 - Almost Done! == | ||
Things are mostly polished up, but we need to finalize lightening holes, sensor locations, and do a run through of the entire system to verify that things will work upon assembly. Our goals for Tuesday are to update the shopping list, finalize the CAD, and start making shop drawings so parts can be sent off to Harris. This will put us ~1 day ahead of schedule which would be really nice. | Things are mostly polished up, but we need to finalize lightening holes, sensor locations, and do a run through of the entire system to verify that things will work upon assembly. Our goals for Tuesday are to update the shopping list, finalize the CAD, and start making shop drawings so parts can be sent off to Harris. This will put us ~1 day ahead of schedule which would be really nice. | ||
== 1/24/ | == 1/24/2023 - Design is Polished Up! == | ||
As we did a double check of our whole subsystem, we noticed some small things that needed to be fixed. We had our blocks for clamping the chain made in aluminum, and for something like this, we want to go with steel because it has higher strength. We also added lightening holes and we're down to 9.5lbs! Better yet, we have holes for sensors, reparability, and it should also make our lives easier for when we go to assemble it. A picture is below. One thing we do need to do is figure out the mounting holes for the pivot bracket, and also work on the gutters for electrical. | As we did a double check of our whole subsystem, we noticed some small things that needed to be fixed. We had our blocks for clamping the chain made in aluminum, and for something like this, we want to go with steel because it has higher strength. We also added lightening holes and we're down to 9.5lbs! Better yet, we have holes for sensors, reparability, and it should also make our lives easier for when we go to assemble it. A picture is below. One thing we do need to do is figure out the mounting holes for the pivot bracket, and also work on the gutters for electrical. | ||
== 1/26/2023 - Playing Catch-up! == | == 1/26/2023 - Playing Catch-up! == | ||
We made shop drawings for some of our parts, did a 3D printing test for one of our bearing blocks, and continued work on our CAD pivot assembly. We also developed a rough mounting solution for our interaction with gripper. | We made shop drawings for some of our parts, did a 3D printing test for one of our bearing blocks, and continued work on our CAD pivot assembly. We also developed a rough mounting solution for our interaction with gripper. | ||
== 1/28/2023 - Nearly There! == | |||
We grinned all day long, reworking our lead screw mounts, pivot assembly, and arm assembly. We are very close to making shop drawings and assembling, so we really need to make a final push to get there! We also have made a piece to interact with gripper. A few action items that still need to be completed are as follows: | |||
* Finish A018 Lead Screw Pivot Assembly, with proper brass bushings for rotation | |||
** Double check stage mounting, mounting to the frame, and triangle supports | |||
* Verify connection with Acquisition | |||
* Make cradle for the arm | |||
* Fix Final Robot Assembly and make it accurate! | |||
Revision as of 21:25, 28 January 2023
*DISCLAIMER* The wiki wasn't operational for the first week or so of build season, so these entries begin from January 12th-ish and beyond.
Kickoff through 1/12/2023
There were lots and lots of concepts that were brought up during prototyping and our whole team design discussion. We did a weighted objectives table to determine which design was favorable based on a variety of criteria. A few of the different ideas that were thrown around were a 4 bar linkage arm, vertical elevator with horizontal elevator, as well as telescoping arm with a rear pivot. We also did some rough geometry sketches during this time, to further support our decisions and data from the weighted objectives table. After that was all said and done, we decided on a telescoping arm with rear pivot. This brings us up to now, 1/18/2023, which is where we have begun detailed design.
1/17-1/18/2023
We have begun detailed design. Here are some rough specs of the arm so far:
- 67-69 inch reach when fully extended
- Dual ball screw actuation for a strong and speedy pivot
- 4", 2.5", and 1" square tubes, with .125", .125" and .188" wall thicknesses respectively
- Have not decided method of actuating telescope just yet
- The posts that the telescope mount to are 20-22 inches tall.
1/18/2023 - Part 2: Continuing Detailed Design
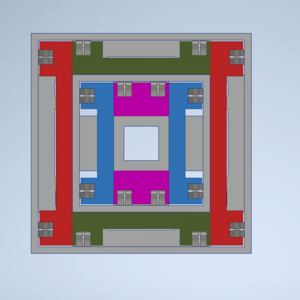
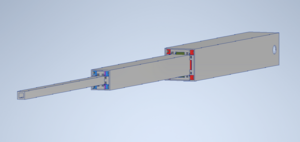
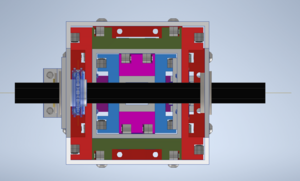
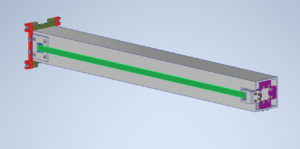
We took our telescoping tubes with bearing blocks, and added all the bearing blocks we need. Now we have actual hard stops for each stage, and things are a little bit more solid. We reduced the bearing block thickness to 5/16" from 1/2" because this arm is not specced to bear 100+ lbs, but much rather the weight of the cone/cube + manipulator. As for the gripper to arm interaction, we are going to tap holes on the end of our Stage 3 tube, and allow the gripper team to do what they want within those holes. Off to the side are some screenshots of our current design fully extended and also the nesting and layout of our bearing blocks. They are color-coded so they're easy to see in CAD.
1/19/2023
We made some improvements/modifications to the telescoping arm in Inventor. We started to design a lead screw with a neo motor to lift the arm. We had one of our students cad a motor mount for the neo for the end of the lead screw. We have decided that the lead screw for the pivot will be direct drive instead of belt drive. We had looked at our cad model from Turbulence (our 2022 robot) to take an idea off of that for the lead screw.
1/21/2023 - Getting Close with Detailed Design!
The arm design is really coming together! We are now going with a hybrid chain and belt system for extension and retraction. We were originally going to go all chain, all the way through, but ran into major space/clipping issues due to the square nested nature of the mechanism. The goal is to reduce as much "slop" in between stages as possible, with somewhat rocky movement being a hallmark of the 2016 arm. This arm also reuses bearing blocks in order to make manufacturing easy. Also, we plan to make large lightening holes in our different stages to make easy of access better. We also did a rough weight check and we came in at 11 lbs! We also checked in with the RCS people to get a rough layout of sensors. We went through the CAD and imported hardware, checking for conflicts between bearing blocks too. There were a few small issues, but nothing we can't fix tomorrow!
1/22/2023 - Almost Done!
Things are mostly polished up, but we need to finalize lightening holes, sensor locations, and do a run through of the entire system to verify that things will work upon assembly. Our goals for Tuesday are to update the shopping list, finalize the CAD, and start making shop drawings so parts can be sent off to Harris. This will put us ~1 day ahead of schedule which would be really nice.
1/24/2023 - Design is Polished Up!
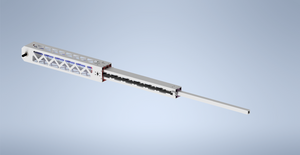
As we did a double check of our whole subsystem, we noticed some small things that needed to be fixed. We had our blocks for clamping the chain made in aluminum, and for something like this, we want to go with steel because it has higher strength. We also added lightening holes and we're down to 9.5lbs! Better yet, we have holes for sensors, reparability, and it should also make our lives easier for when we go to assemble it. A picture is below. One thing we do need to do is figure out the mounting holes for the pivot bracket, and also work on the gutters for electrical.
1/26/2023 - Playing Catch-up!
We made shop drawings for some of our parts, did a 3D printing test for one of our bearing blocks, and continued work on our CAD pivot assembly. We also developed a rough mounting solution for our interaction with gripper.
1/28/2023 - Nearly There!
We grinned all day long, reworking our lead screw mounts, pivot assembly, and arm assembly. We are very close to making shop drawings and assembling, so we really need to make a final push to get there! We also have made a piece to interact with gripper. A few action items that still need to be completed are as follows:
- Finish A018 Lead Screw Pivot Assembly, with proper brass bushings for rotation
- Double check stage mounting, mounting to the frame, and triangle supports
- Verify connection with Acquisition
- Make cradle for the arm
- Fix Final Robot Assembly and make it accurate!

