Fabrication - .pdf: Difference between revisions
FieldCrate (talk | contribs) No edit summary |
FieldCrate (talk | contribs) No edit summary |
||
| Line 47: | Line 47: | ||
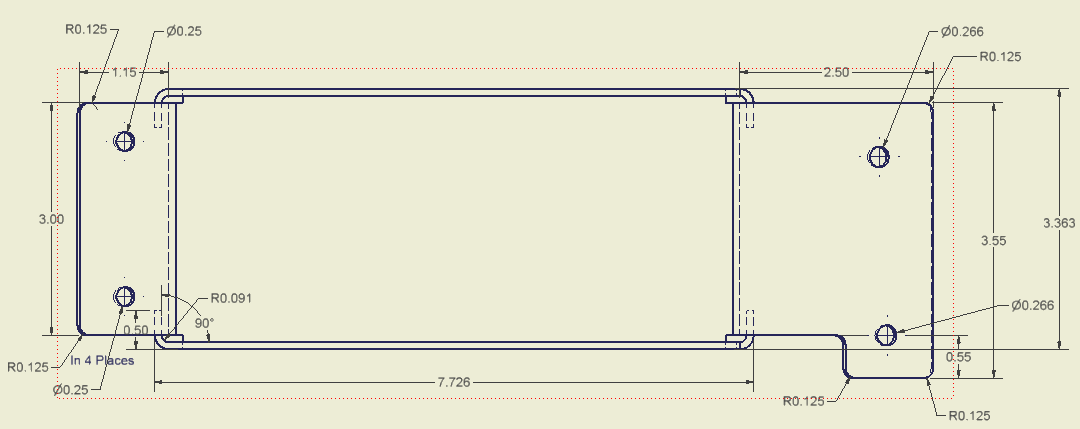
'''<span style="color: #ff0000">Sample Drawing:</span>''' | '''<span style="color: #ff0000">Sample Drawing:</span>''' | ||
[[Fabrication | [[Image:Parts Fabrication Example1.PNG|Sheetmetal Drawing Example]] | ||
Sheetmetal Drawing Example: [[Image:Parts Fabrication Example1.PNG|Image:Parts Fabrication Example1.PNG]] | |||
Revision as of 06:02, 21 January 2011
Creating a Drawing and .pdf from the Drawing
Once your part is complete, create a new drawing for your part (.idw).
Drawing Requirements: (use the FIRST/Robotics drawing template under the English tab on the template menu).
- Show main views of the part (front, right, left, top, bottom)
- Current Date - this needs to be updated everytime a drawing is submitted to get parts made (this acts as the revision control)
- State name of student who created the drawing
- State the material to be used
- State quantity required
- Dimension the part
-> length, width, height
-> threaded hole sizes and quantities
-> dimensions of major features
( * if the part is a sheetmetal part that is bent, then the dimensions must also include the location of the bends and the radius used to bend the part)
- Indicate if any hardware needs to be installed and on which surface (such as standoffs or inserts - PEMS)
SAMPLE DRAWING
Saving the Drawing:
Once the drawing is complete, go to Save a Copy ---> Save a Copy As AUTOCAD .dwg (Autocad LT.)
Also create a .pdf of the drawing.
<span style="color: #ff0000"</span>
Things to Rememeber:
If the part will be welded, then care must be taken to design with the proper dimensioning scheme leaving room for the weldments.
<span style="color: #ff0000" />
Sample Drawing:
